What information we can get from these 3 snow pack stability tests?
There are three simple and effective tests that can be performed to understand and assess snowpack and its stability. The compression test CT, the extended compression test ECT and the small block test.
Compression test CT
First, use an avalanche probe to find a good spot where the probe can cleanly go down 100 to 120 cm. This can save a lot of time when digging. Instead of running directly into rocks/ridge lines, solid ice, unsuitable snow cover/soils, or trees.
Search for neutral, open areas without wind or large surface/snow cover effect.
Remember that the CT test you perform will only give you an indication and guideline for the small area near the test, as the snowpack further away will be different.
Dig a 100 to 120 cm deep snow pit with a slope of about 30 to 35 degrees (a skier sinks about 80 cm into the snowpack).
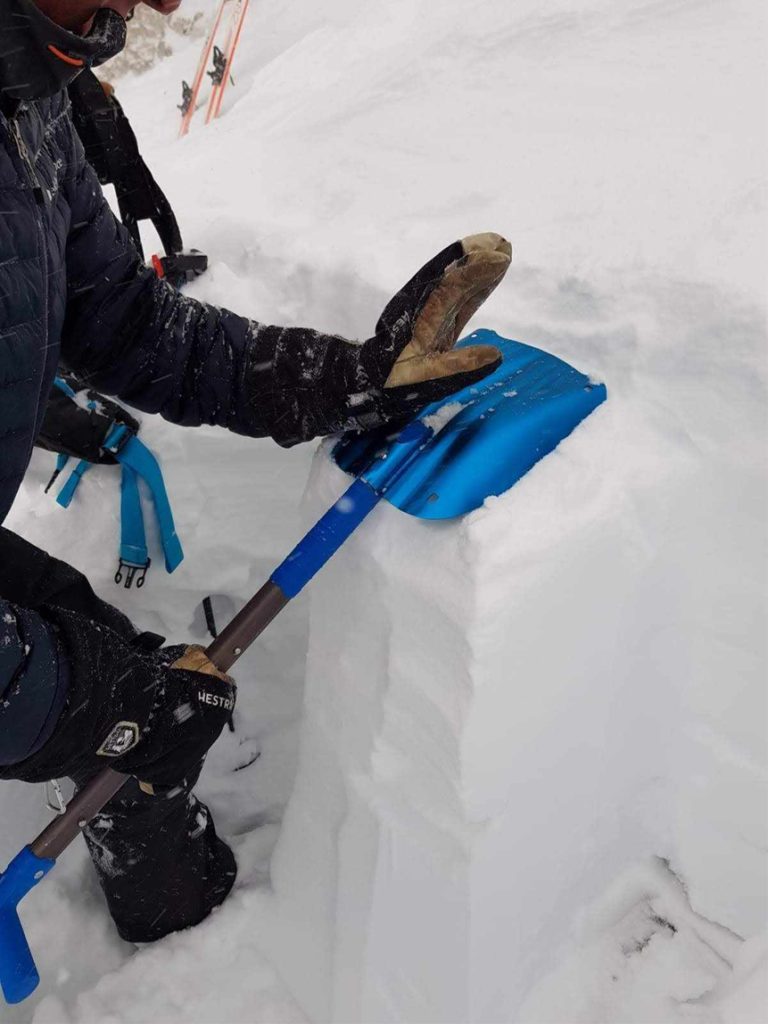
Isolate a 30 cm by 30 cm column of snow.
Place the shovel blade on the column and do the 10-10-10 test (10 x wrist/ 10 x elbow/ 10 x shoulder)
Search for fractures
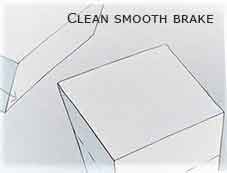
Pay particular attention to the fracture and how it occurred, i.e. a clean fracture or a fracture with ridges/steps on the surface of the fracture/break
If there are clean and fast shears, this test should be followed up with an ECT extended column test.
Start with ten strokes from the wrist, then ten more strokes from the elbow, then ten more strokes from the shoulder, using the full weight of your arm. Do not push your arm into the snow, but let it fall by its own weight. Light tapping is bad, hard tapping is good. But even with hard knocks, if there is a fracture, we strongly advise you to also do an extended compression test ECT.
Extended compression test ECT
The extended compression test ECT is the same procedure as the compression test CT described above, the only difference being that a 30 cm by 90 cm column is isolated.
Dig a 100 to 120 cm deep snow pit with a slope of about 35 to 30 degrees (a skier sinks about 80 cm deep into the snowpack).
Isolate a column 30 cm by 90 cm column of snow
Place the shovel blade on the column and do the 10-10-10 test (10 x wrist/ 10 x elbow/ 10 x shoulder)
Search for fractures
Pay particular attention to the fracture and how it occurred, i.e. a clean fracture or a fracture with ridges/steps on the surface of the fracture/break
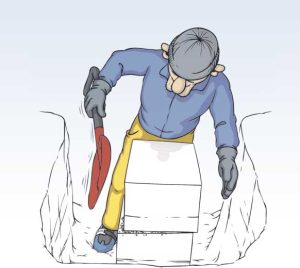
Small block test / Simplified snow profile
A simplified snow profile can be used to look for weak layers and their stability in the snowpack. To perform such a test, we dig out a block. The block should be 40 x 40 cm, where the block should be exposed, depends on the structure of the snow cover. As a rule, it is enough to dig about one meter deep. This test can be performed in a few minutes, and the results and the weak points in the snowpack can be easily and clearly seen. The test can also be performed on level ground.
This test only tells us about the weakness of the small area of the test site, but not about the weakness of the surrounding snowpack and its weak layers.
Dig the block 40 x 40 cm and about 1 meter deep and place the shovel on top of the block. Then, by tapping lightly with the shovel (impact resistance plays a lesser role), you can see if the snowpack is showing up weak layers. Next, place the avalanche shovel on the side of your excavated block and tap the shovel with your hand to see if there are any brakes and where the weak spots are.
Small block test / simplified snow profile – brake analysis
Below are some guidelines on how and what to evaluate when analyzing a small block test.
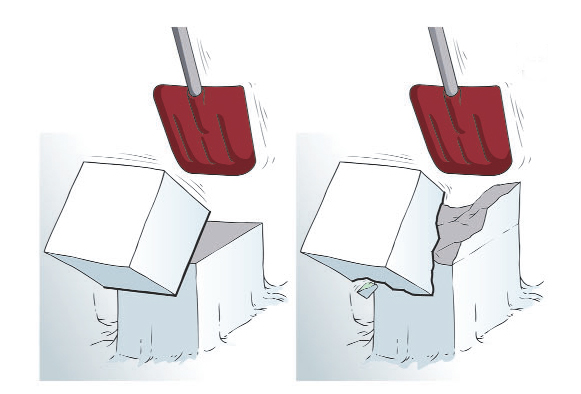
Analysis of the Break/fracture
There is no weak layer
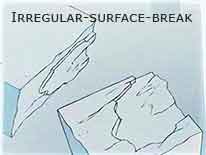
Moderate to hard tapping would produce a break/fracture with a ridge/step breakage
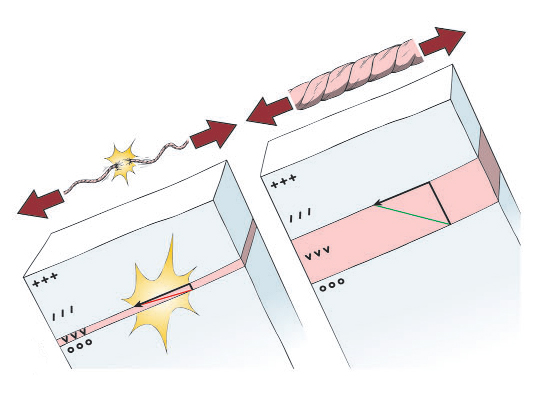
The most important factor is the type of fracture observed between the blocks on the surface, rather than the force used to tap or strike the blade surface. The type of break provides information on whether there is spreading of the brake in the weaker layer of the snowpack.
Unfavourable clean surface break and factors to consider:
The flatter and cleaner the break, the more likely it is to continue and spread to a larger area of the snowpack. It is important that the broken out block is not damaged so that it can be closely observed and analysed.
Favorable surface break and factors to consider:
When you observe that an irregular surface breaks, you must ask yourself the question, “Does it break easily?” and the answer is NO.
The next factor you should ask yourself?
Whether the weak layer is thinner or thicker. The thinner the weak layer, the more critical the situation. A thin weak layer breaks more easily because the stress is absorbed less well than a thick weak layer.
The next factor to consider is the depth of the weak layer
The closer the weak layer in the snowpack is to the surface, the easier it can be broken under the additional load of skiers or skiers
The deeper the weak layer is in the snowpack, the more load, skier or skiers are required to break the weak layer. But keep in mind that the individual skier will only put additional stress on the snowpack in a limited area and it will sink deeper.
The next factor to consider is the stability of the snowpack over the weak layer, whether it is soft or hard
If the snow layer above the weak layer is soft, you sink deeper and the weak layer is more likely to break.
The softer the snow is, the further you sink into the snowpack and the pressure only affects a certain area and goes into the depth of the snowpack.
The harder the surface or layer, the greater the pressure on the snowpack (note that if the layer or surface of the snowpack is harder – more skiers without gaps – the forces add up over a larger area and are more pronounced).

The next factor to consider is the size of the crystals of the weak layer
The larger the crystal shape in the weak layer of the snowpack, the more likely the fracture/break will spread in the weak layer, covering a larger area.
